Understanding the Process of Validating Your NEM to RIS
The RIS earning system embodies a collective ideology aimed at welcoming millions to the blockchain technology landscape, making it effortless to build your community circle by inviting others through a personalized invitation link.
The unofficial launch commenced with the (RIC Server), serving as the primary community chat forum, equipped with features to facilitate community building while eagerly anticipating the official launch and the release of the official RISTIC application.
To learn how to generate your personalized invitation link on the RIC Server, you can read the blog post titled (Accelerate Ecosystem Building).
STEP-BY-STEP GUIDE ON HOW TO CHECK NEM to RIS:
Step 1: Go to the RIC SERVER and check NEM-INVITE-TRACKER.
![]()
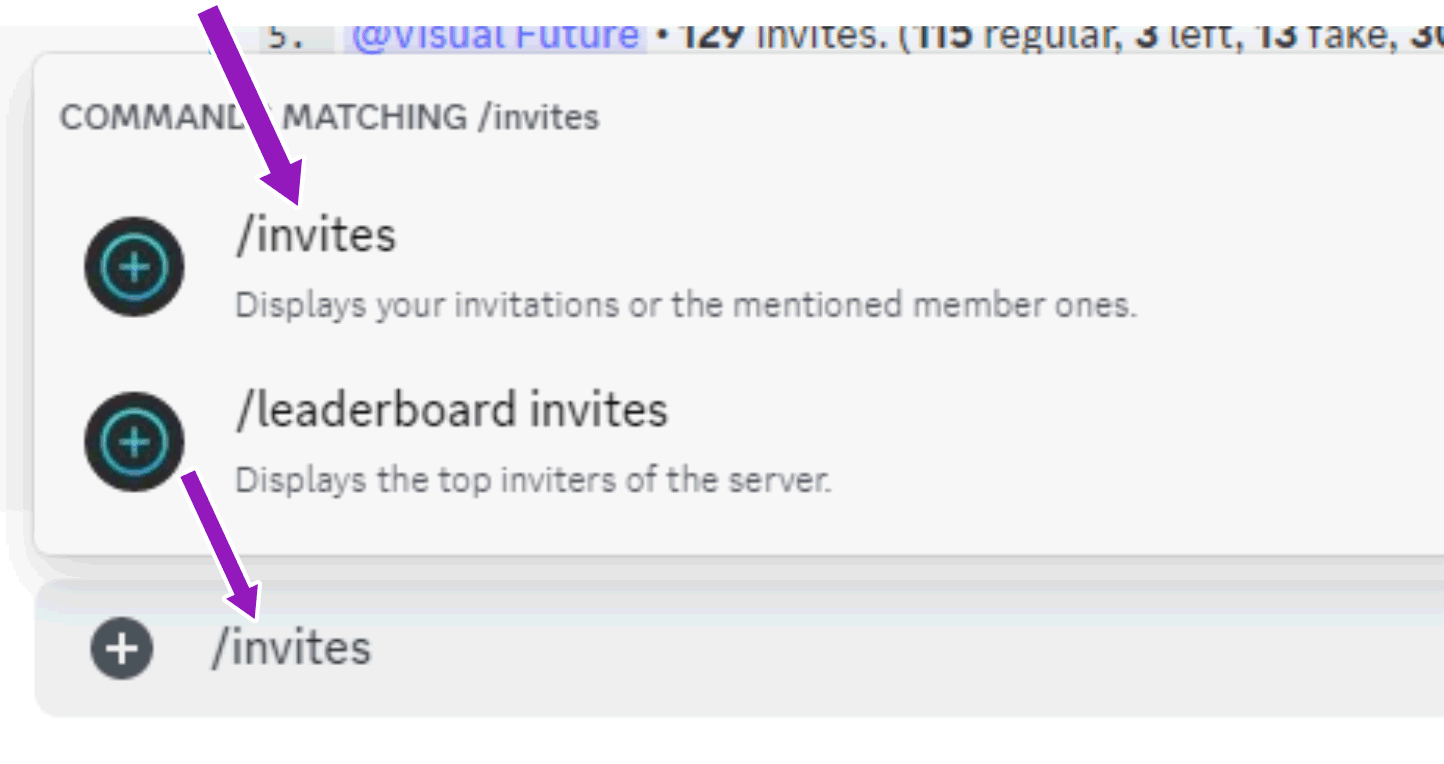
Step 2: Type /invites and select the same pop-up text as shown in the picture below.
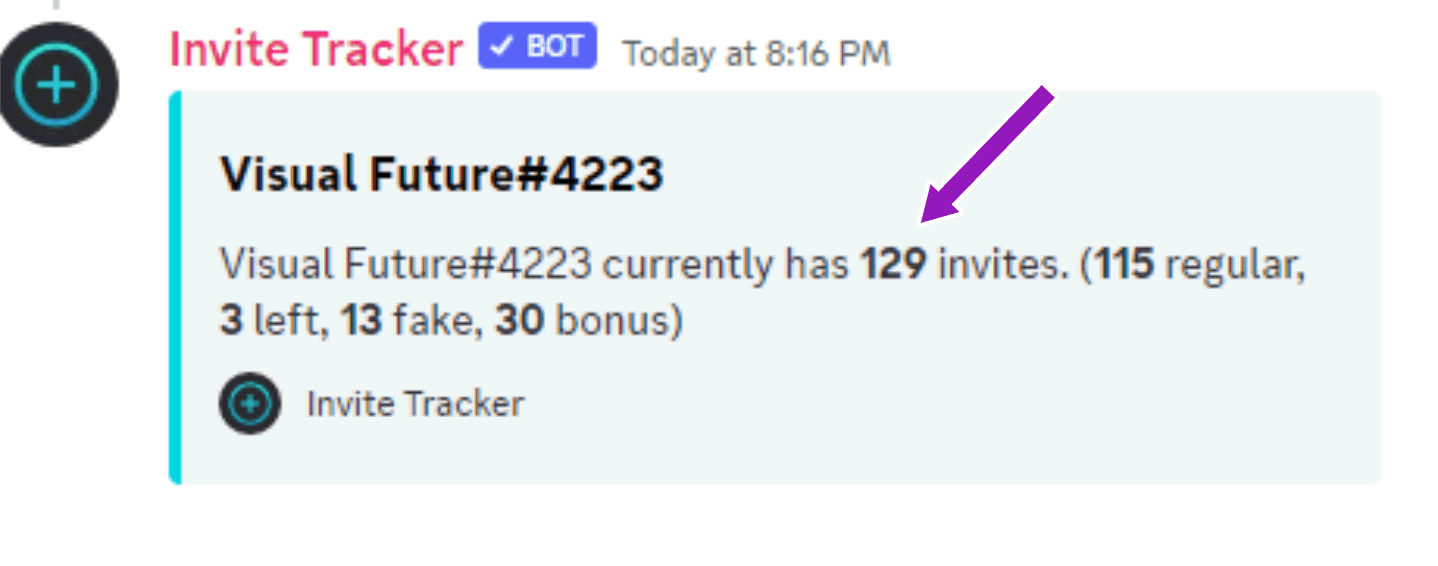
Step 3: Wait for the invite tracker, and you will see content similar to the example below, then send to the nem-invite-channel.

Step 4: The Invite Tracker will run, your result will display, make sure to take note of the active invite you have, as indicated in the example below.
If you have successfully counted the total NEMs in your community circle, proceed to the next steps to validate your NEM to RIS.
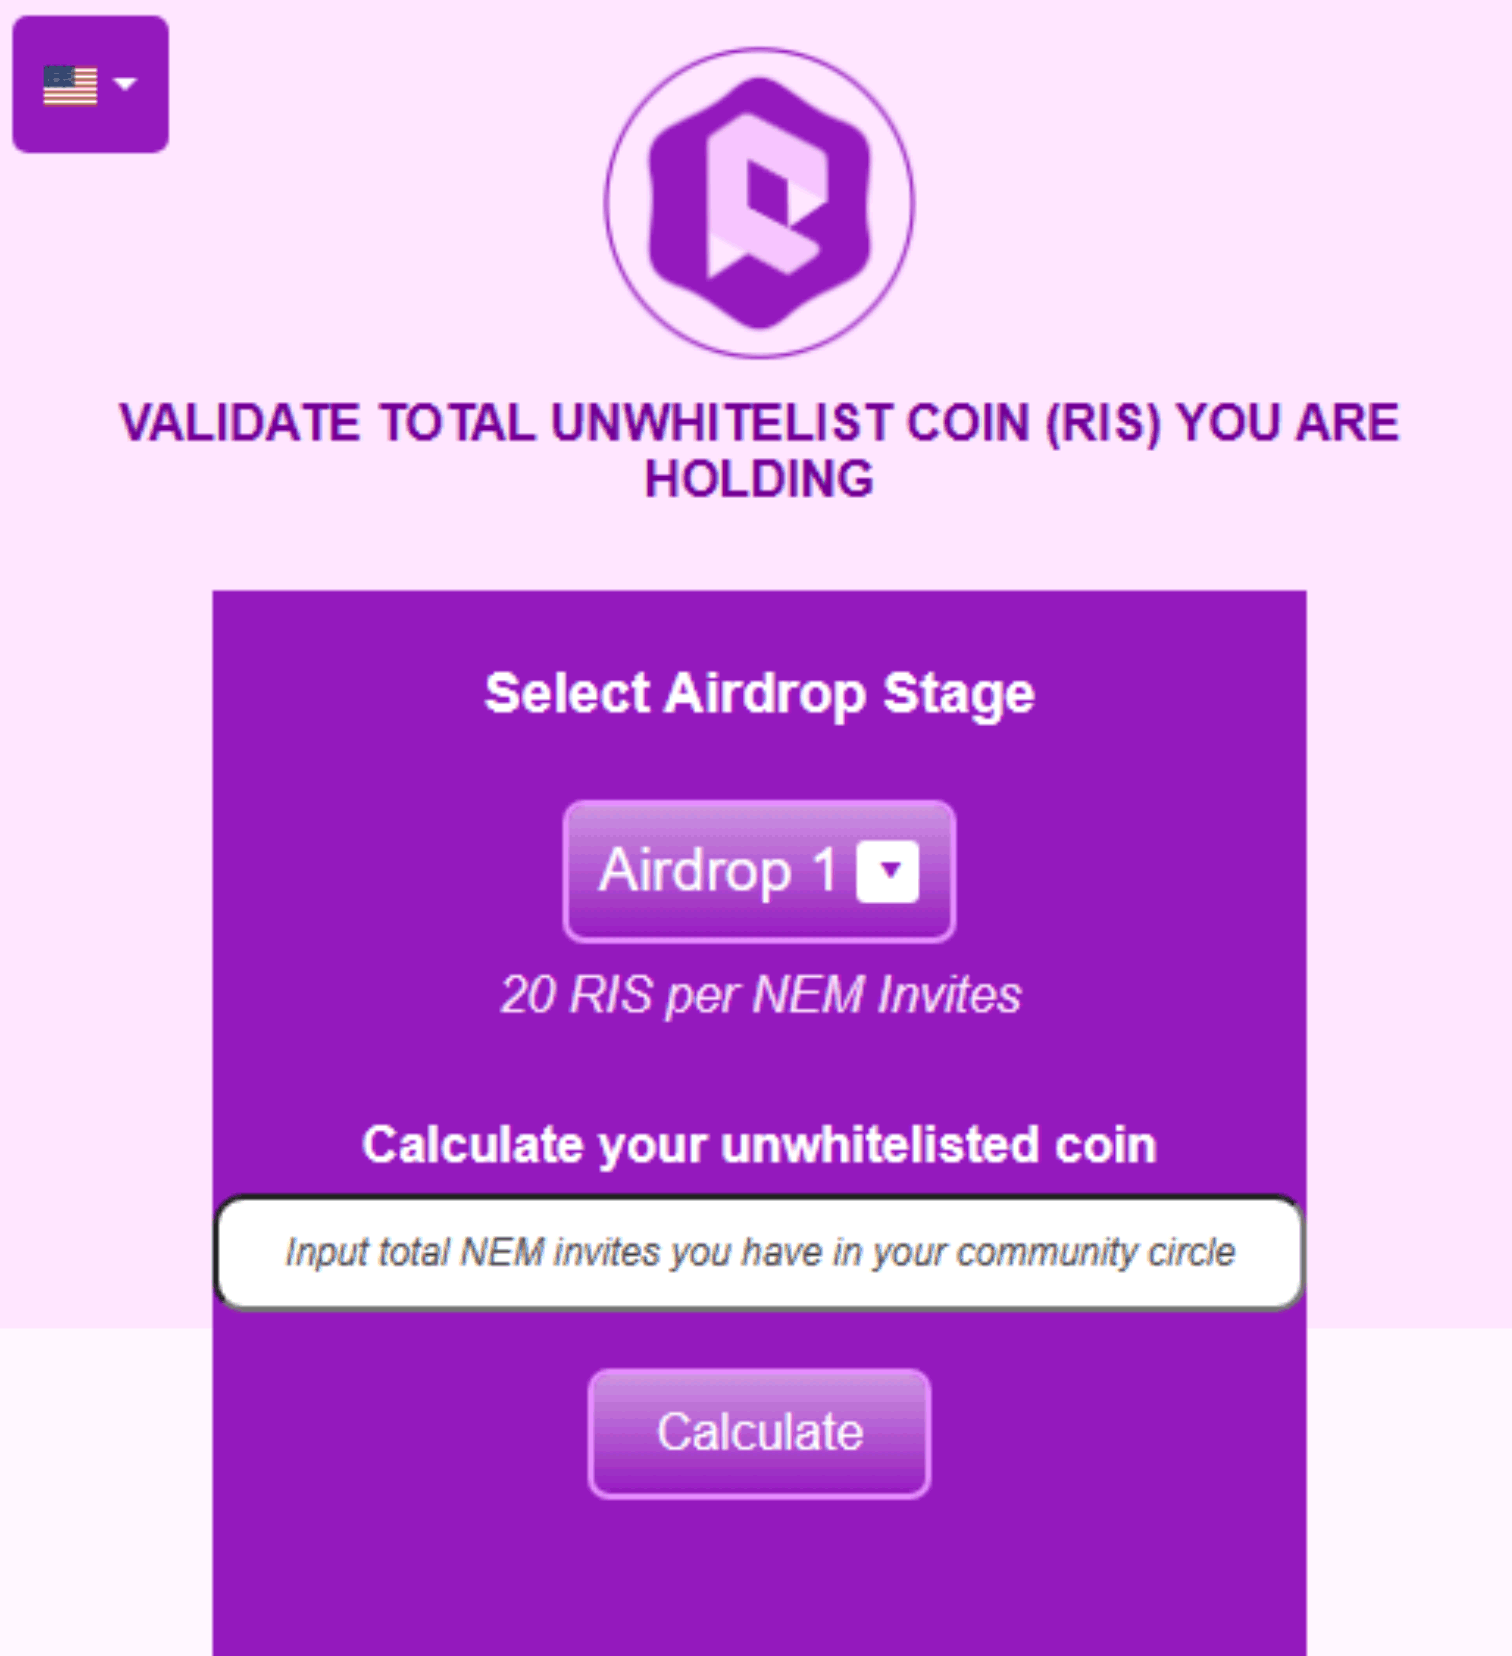
Step 5: Visit the website https://validate.risticlabs.com.
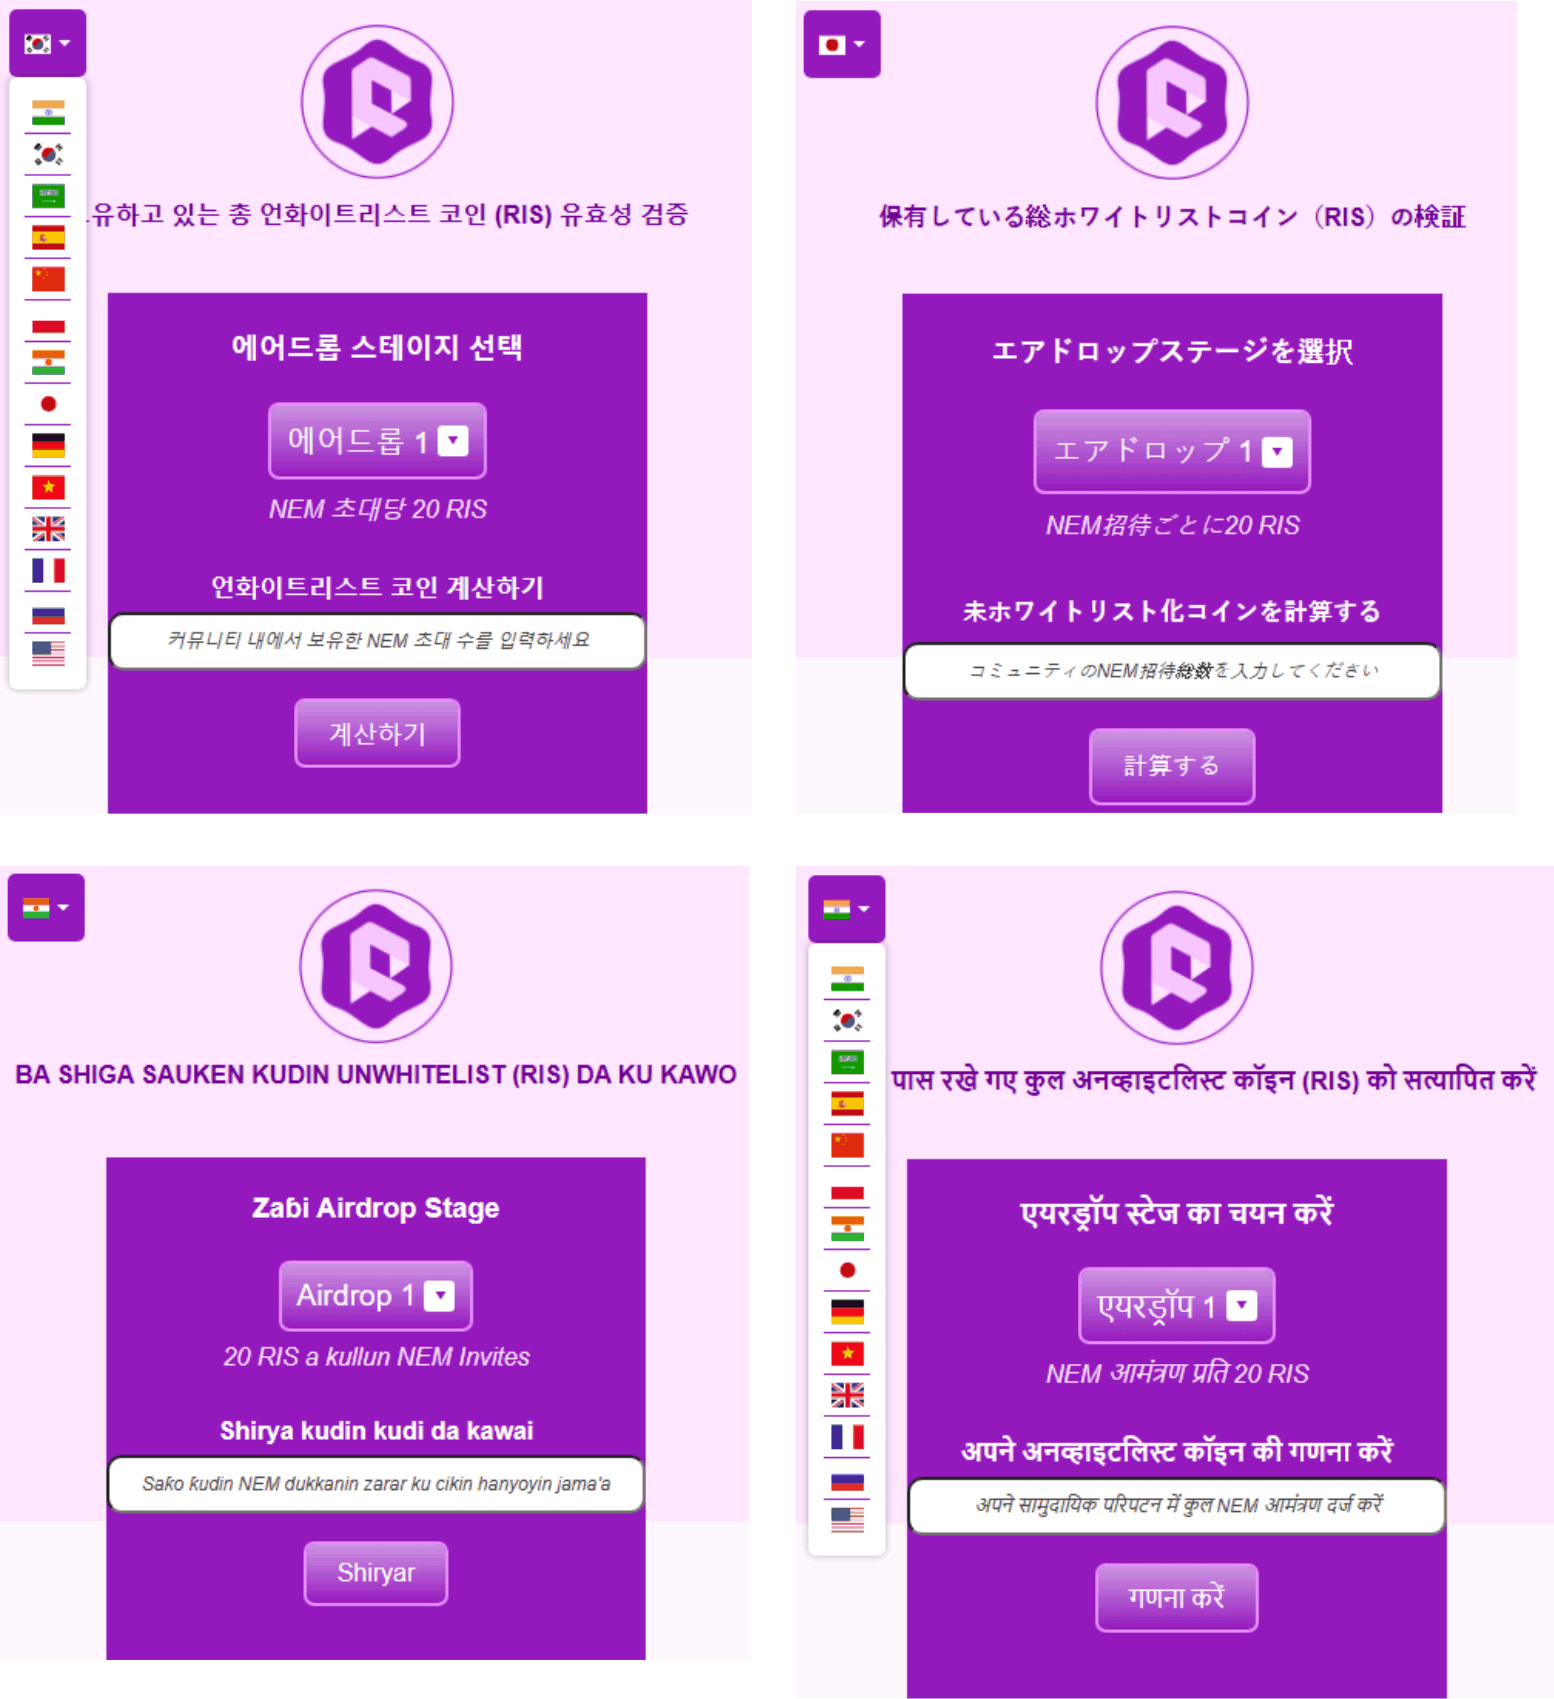
Step 6: Select your primary language from the flag options.
Step 7: Choose the Airdrop Stage.
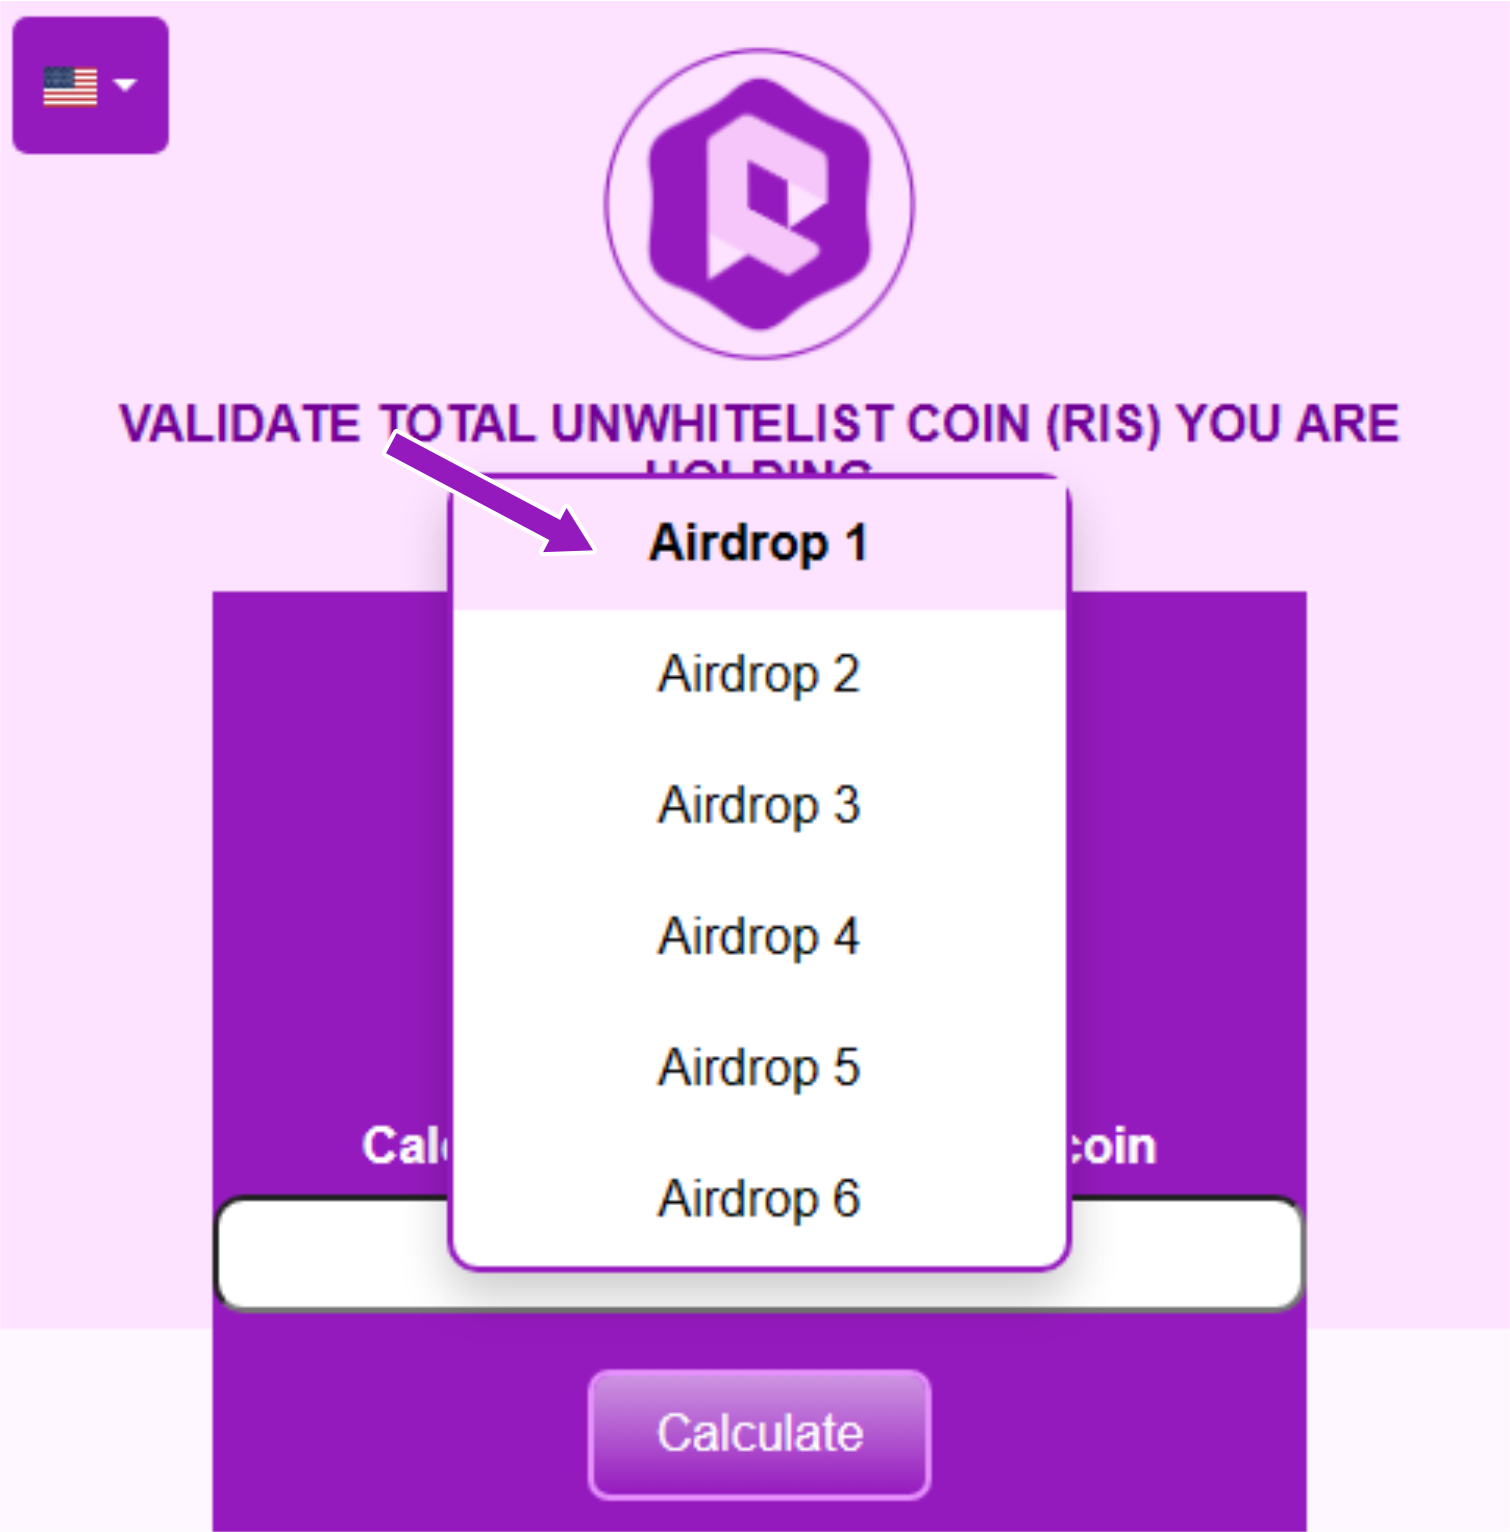
Step 8: Input the total number of NEM invites you have in your community circle from Step 4.
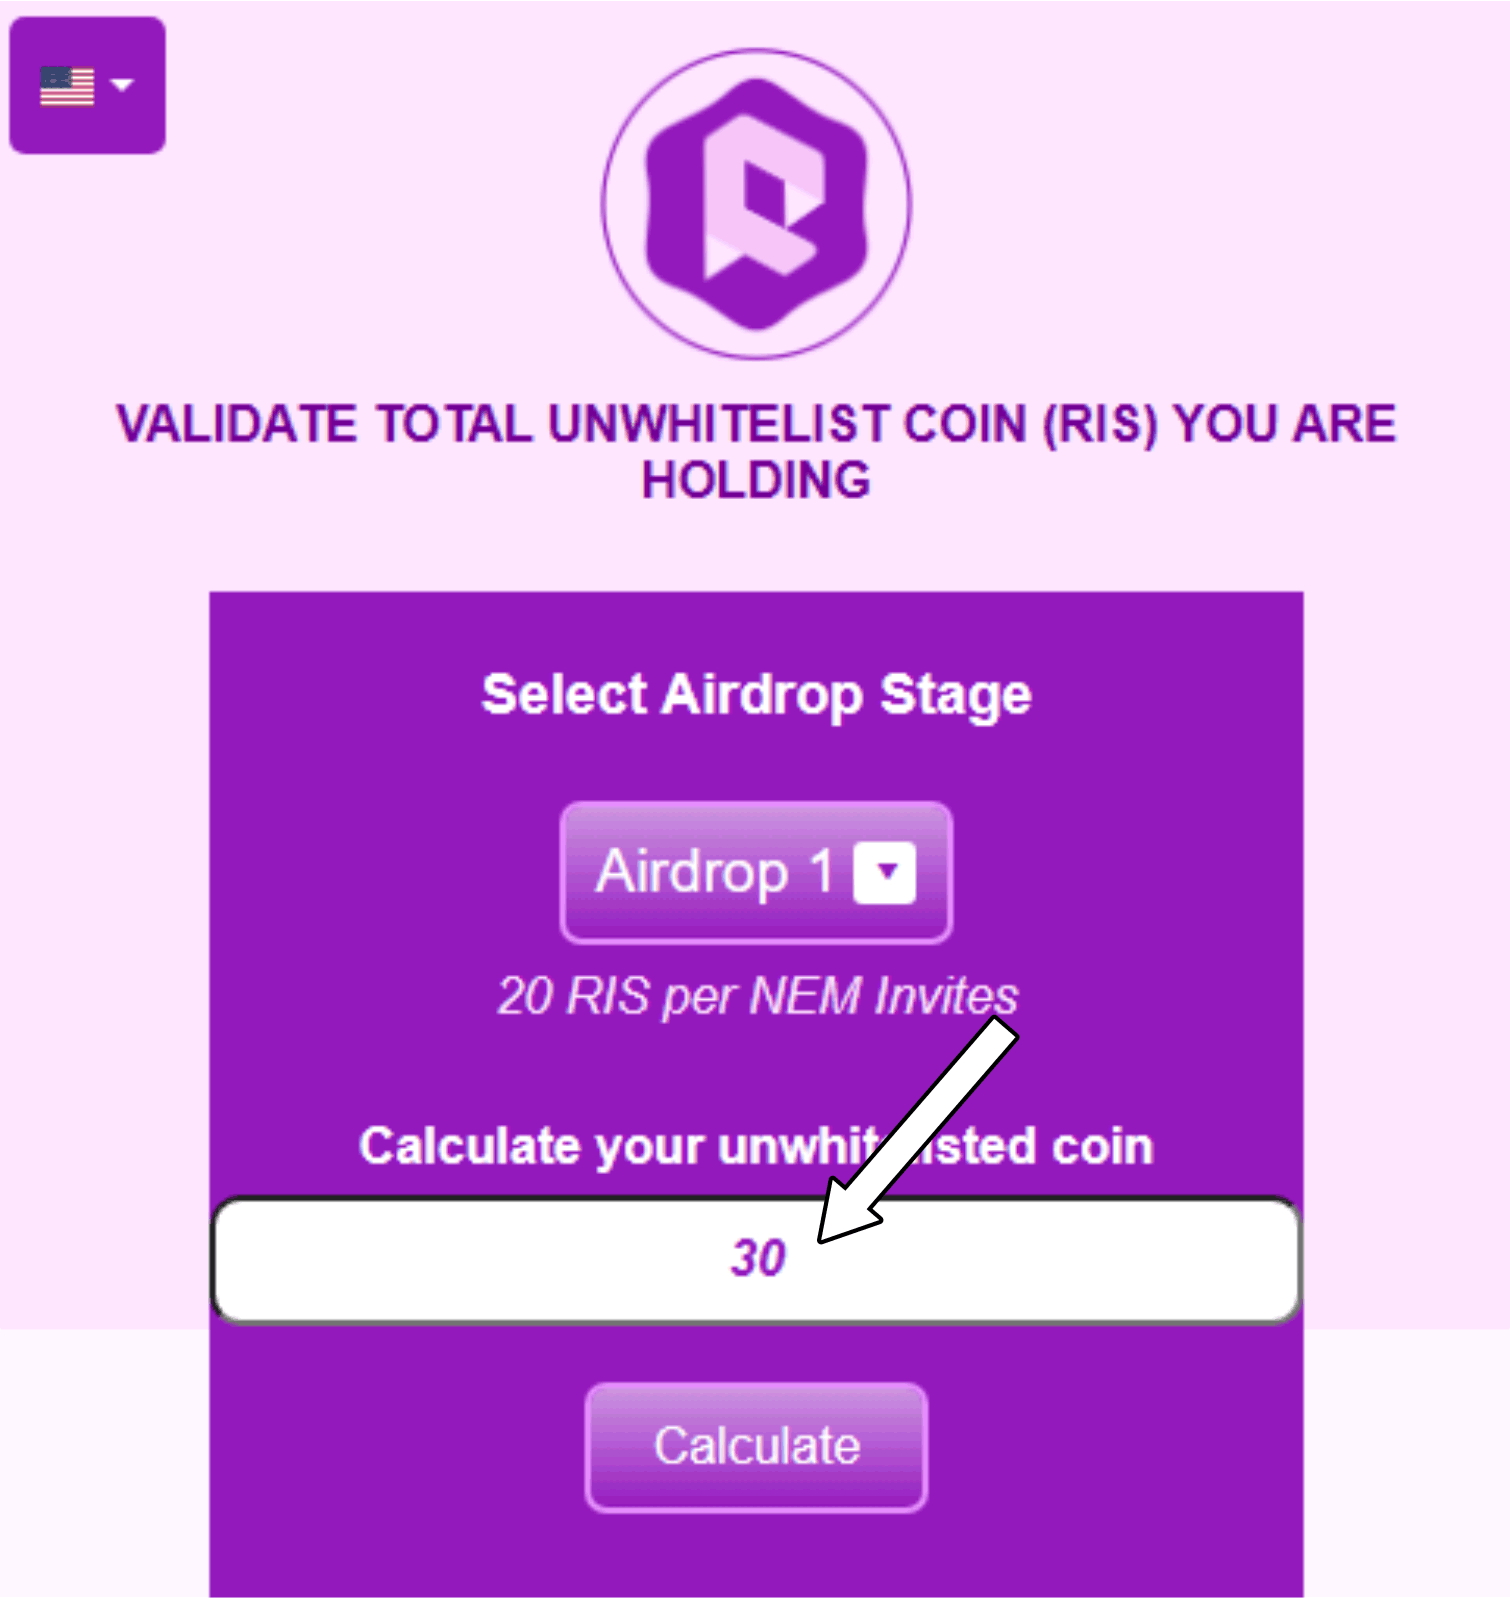
Step 9: Click, press, or push the "Calculate" button and your result will be displayed as seen in the example below.
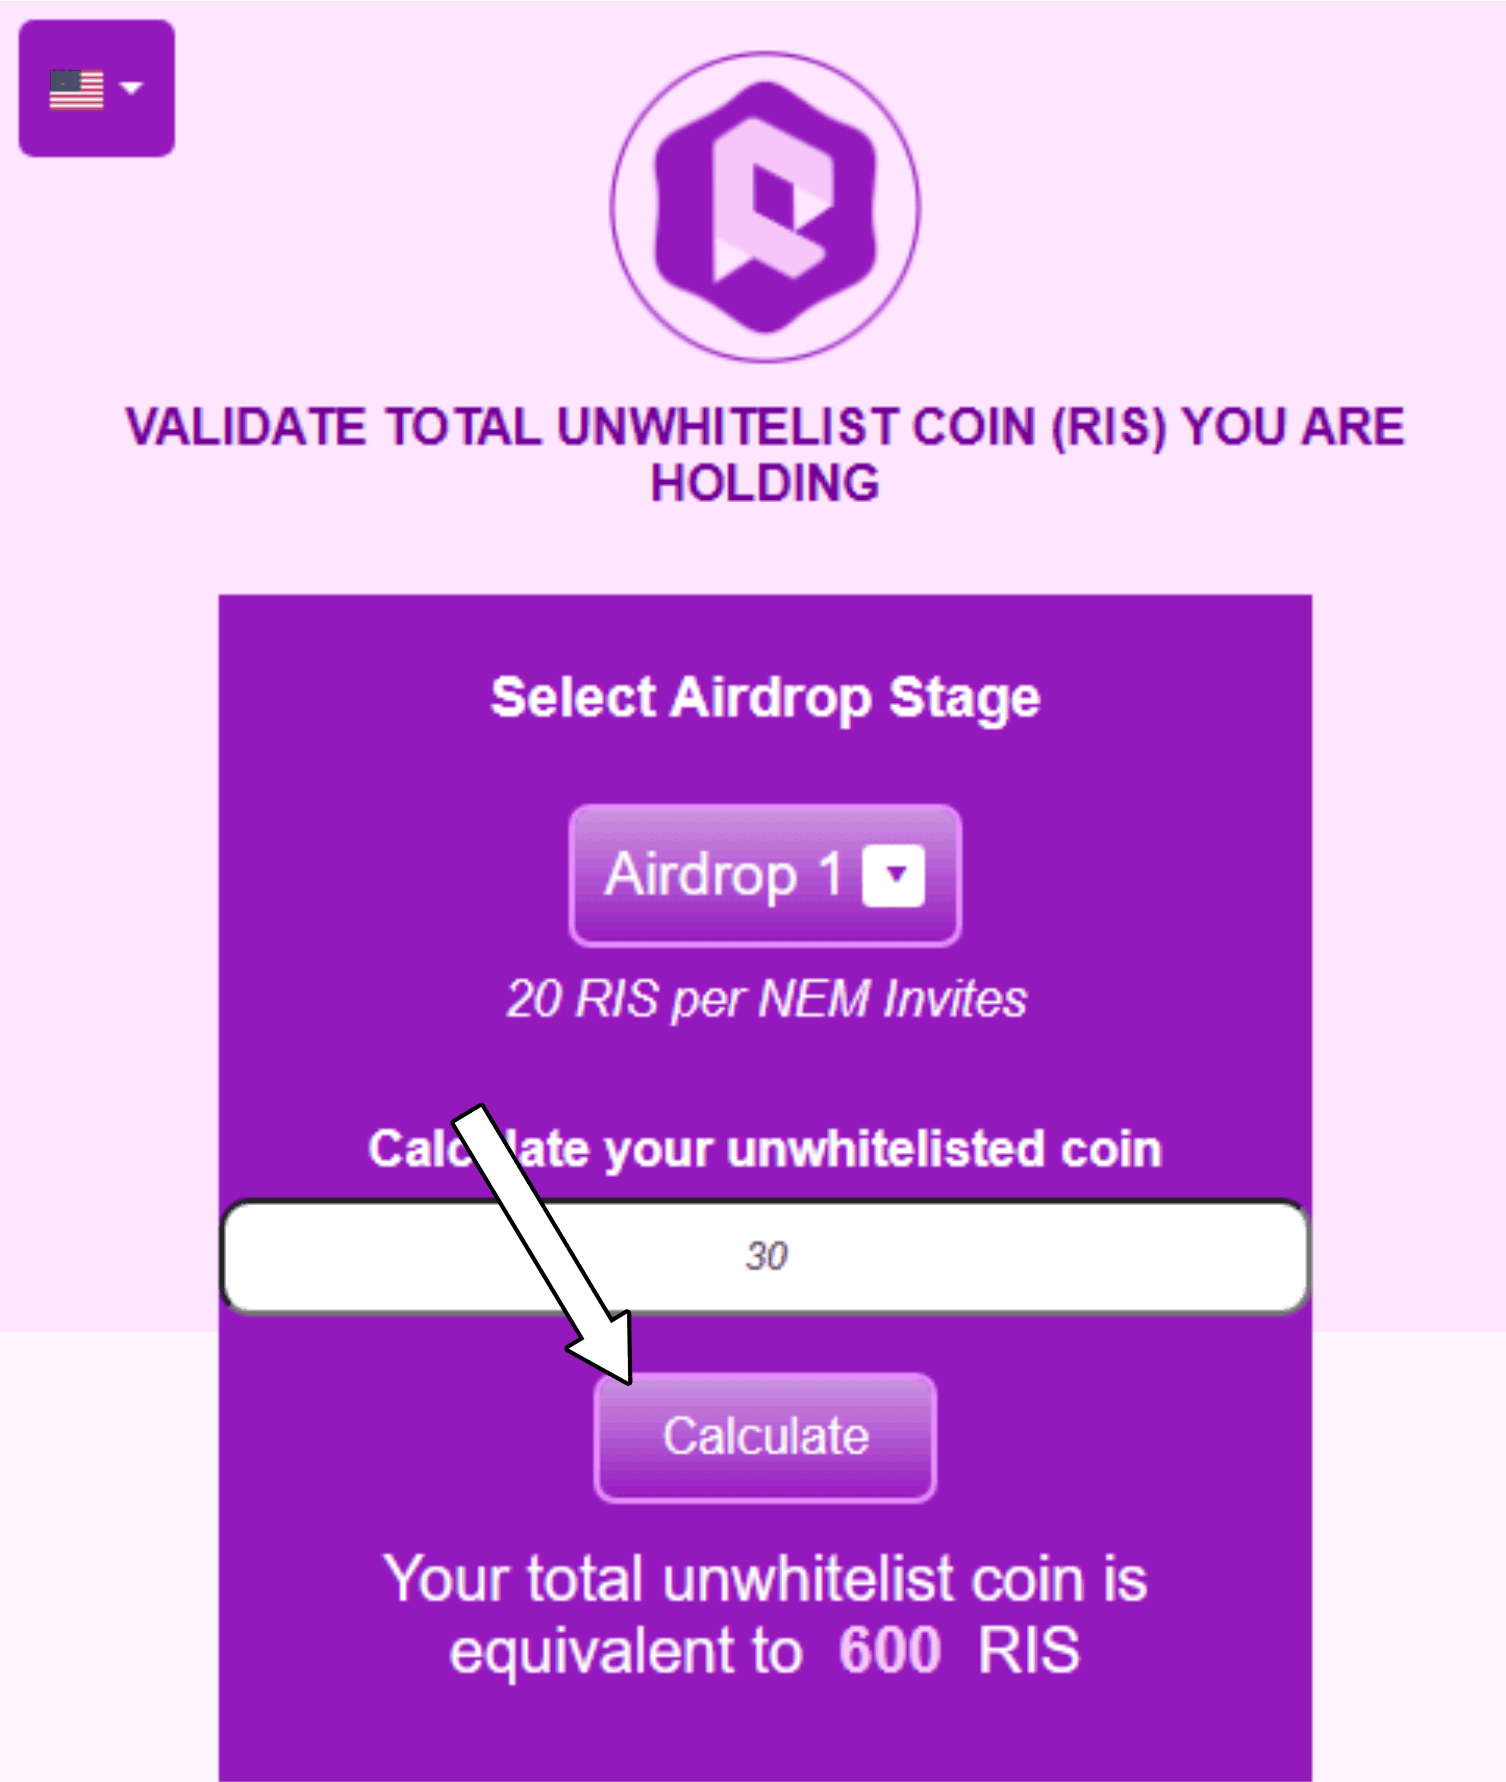
Note: The NEM to RIS validating system is designed to provide Novatores with an easy calculation of the total RIS they are holding, equivalent to the NEMs in their community circle. A more advanced and automated system will be made available during the official launch.
Keep Building